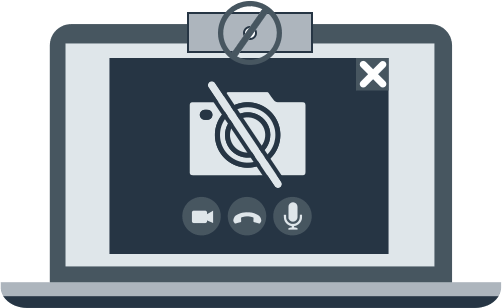
Laptop Camera is Not Working? Fix It Now!
In this article you will find out:
- efficient solutions for this issue
- how to protect your data
Are you ready? Let's read!
1. Troubleshoot laptop camera issues
If an error appears on the screen stating the laptop webcam is not working, you can try to solve the problem by running the hardware troubleshooter. With this utility, you can detect any problems with devices on the system. This is especially true in the case of errors with newly installed hardware on a PC or laptop. The utility will also allow you to find a solution and troubleshoot problems related to the operation of all new devices and hardware for your computer.
- Right-click on the Start icon and go to the Control Panel.
- Go to View by Options in the upper-right corner of the window.
- Expand the catalog and click on the Large icons option.
- Go to Troubleshoot and click View All in the left pane area.
- Click on Hardware and Devices and then Next. Carefully follow the instructions to open the Hardware and Devices troubleshooter utility.
2. Upload new camera drivers
For the operating system to function properly, you must keep your hardware and device drivers up to date. The best solution for this is to automatically update your OS drivers. The following is a detailed instruction for updating drivers, in particular those for cameras for your laptop.
- Right-click the Start menu and go to Device Manager.
- In the new window, select Imaging Devices. Find your laptop camera or webcam driver in the list.
- Go to Update Driver Software. Here you will be presented with a choice of how to search for a driver, click on Search automatically for updated driver software.
If you already have the required driver in the file system, click on Find Drivers on my computer, and then follow the path to the location of the driver's executable file. You will need to have a stable Internet connection.
- Click the Allow Me to Select From a List of Device Drivers on my computer value. Select the required USB video device and click Next. You should follow the instructions to update the webcam driver.
- At the end of the process, restart the system.
If you are a laptop user, in particular from the manufacturer HP, please follow the following guidelines to reinstall the laptop camera.
- Right-click on the Microsoft icon in the taskbar and then on Device Manager.

- Go to the Imaging Devices tab and expand the catalog available there.
- Right-click your laptop's webcam or built-in webcam and click the Delete tab.
- Be sure to restart the OS for the changes to take effect.
After the system has finished loading, the driver will be reinstalled in automatic mode, wait for the process to complete. Now you just have to check whether the Camera Not Working Windows 10 error has been fixed by opening the laptop's camera again.
An additional way to resolve the Windows 10 camera not working error is to install the driver in compatibility mode.
You will need an Internet connection to download the latest driver from the manufacturer's official website. Once the download process is over, right click on it and go to Properties. Click Compatibility and check the box next to Run this Program in Compatibility Mode. A directory will open in which you need to select an operating system. After finishing the driver installation and restarting the system, check the performance of your webcam on the laptop.
By rolling back the driver, you can also find a way out of this situation. Follow the instructions below.
- Right-click the Microsoft icon on the taskbar and go to Device Manager.
- Here find Imaging Devices, click the arrow to expand the catalog.
- Right-click on the Webcam line and go to Properties.
In the Driver tab, click on Driver Information. Here you need to look up the filename with stream.sys. Please note that if stream.sys is available on your laptop, this means that you need to replace the camera since it is compatible with OS versions up to Windows 7. If this is not the case, roll back the camera in the Rollback Driver tab according to the instructions.
- Go to Device Manager as mentioned above.
- Click on Imaging Devices and expand the list provided.
- Right click on Webcam and go to Properties.
- In the Driver tab, click on Roll Back Driver. Click on the Yes message box. As soon as the action is completed, reboot the laptop.
3. Examine Your Protection
Do not forget that antivirus software may also cause the Camera Not Working Windows 10 error to occur, since the antivirus can block the operation of programs. To solve the problem, you just need to find the antivirus settings and disable access blocking and also allow the laptop camera to be used. You can easily find the most detailed information on this solution on the official website of your antivirus software.
4. Check Configurations
If the previous solutions did not help you to cope with the webcam not detected error, it is recommended to check the camera's privacy settings.
- Click the Start menu and go to Settings.
- In the search box, type Webcam.
- Click the Camera Privacy Settings tab.
Make sure the Allow Apps to Use My Camera option is enabled.
5. Login as Another User
Often, account issues are the problem with a webcam not detected. For the best solution, follow the instructions below.
- Open the Start icon in the lower left corner of your laptop screen and go to Settings.
- Click Accounts and then Add Someone Else to This Computer. Follow the settings for registering a new user with a name and password. As a result, a new user account will be created.
- Click Change Account Type. In the directory that you can expand, find Administrator to give the new account administrator rights.
- Restart your laptop and log in with your new account.
Now check if your webcam is working. If this action is successful, you can determine what caused the damage to the previous account. Don't worry, there is a solution to how to fix such damage.
In the newly created account, downgrade your old account. Click Apply or Ok. Revert to the previous account at the Administrator level. Repeat these steps for several cycles as this will remove all damage. When the errors are fixed all, leave your old account with administrator rights.
Need to Roll Back OS Update? Make Sure Your Data is Safe
When performing any actions with your operating system, you must definitely take care of the safety of your files. You are better off safe than sorry, and in case of system failures, you won’t be stuck not knowing what to do to get this data back. And system failures can often be caused by power outages, data loss due to viruses and malware, or inadvertent deletion of data. But do not worry ahead of time about such an incident happening. A program for recovering data on any media, DiskInternals Partition Recovery, has been developed for these situations and has existed for many years.
The program is completely indifferent to the reasons for the loss of files of most formats, be it video clips, music, images, or documents. The size is also unimportant, the program copes with any size perfectly. You can either immediately download the executable file or try the trial version from the website to familiarize yourself with the program's capabilities. Run DiskInternals Partition Recovery and after following just a few steps through the recovery wizard, wait a little while for the file system scan to finish. As a result, you will even be able to view files potentially available for recovery in preview mode without paying a cent. Then, if you are satisfied with the program’s work, purchase a license key and save the files on any possible storage medium and do not worry about the safety of files anymore, DiskInternals Partition Recovery will do everything for you!