Windows could not automatically detect this network's proxy settings - fix it now!
In this article you will find out:
- efficient solutions for 'Windows can't detect proxy settings' issue
- how to protect your data
Are you ready? Let's read!
About 'Windows could not detect proxy settings' issue
Windows 10 users sometimes complain about problems with the proxy server.
At the same time, they receive an error message such as:
- Windows 10 cannot detect proxy settings,
- Windows cannot automatically detect the proxy server,
- Windows does not save proxy settings,
- Windows proxy settings are constantly changing,
- Windows 10 proxy settings are not saved; they are changed.
This leads to the fact that the Internet on computers works very slowly, loading pages constantly freezes. Plus, it is challenging to access video streaming sites (YouTube, Vimeo, Netflix, etc.). As you can see, this can be a pretty serious problem in certain situations. Solve this error simply with the following effective methods.
Review your preferences
First, check that your proxy settings are correct:
In the Run dialog box, type inetcpl.cpl and press Enter.
In the new window, select the “Connections” tab and open the “Local Area Network Settings”, where you check the correctness of your proxy server settings.
Also, try resetting your Internet settings; this also helps fix the “Windows cannot automatically detect proxy server” error.
To do this, press Windows Key + S and enter Internet options.
On the Advanced tab, click Reset. You can select the Delete personal settings checkbox to also clear your personal data. Then click Apply and close the dialog box.
Instead of resetting your Internet settings, you can try changing your proxy settings.
First, you need to click on the Start button and then open the Settings app.
In the Network & Internet section on the left pane, go to Proxies. Then, on the right pane, turn off Auto-detect settings and save your changes.
Now, check if the “Windows 10 can’t detect proxy settings” error persists.
Change TCP / IP through Command Prompt
If the previous methods did not help to cope with your situation, try resetting TCP / IP. To do this, press Windows Key + X and select Command Prompt (login as administrator) from the menu. Type: netsh int ip reset resetlog.txt and press OK or Enter. Restart your computer and see immediately if the problem is resolved.
Get rid of antivirus
Your third-party antivirus software, such as Avast and AVG, can cause proxy server problems in Windows 10. To verify this is the case, it is recommended that you uninstall your current antivirus software at least temporarily. You can find correct and detailed instructions for removing or disabling the antivirus on the official website of the antivirus application manufacturer.
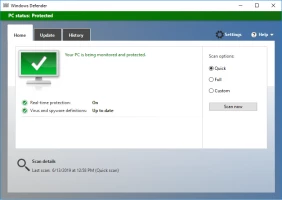
Don't worry; your computer remains safe after you uninstall the security application. Windows 10 comes with a built-in Windows Defender to keep your computer as secure as possible in all conditions and situations.
In addition, you can secure yourself online with a dedicated tool to secure your network. This is a VPN; it protects your computer from network attacks and blocks unwanted access by masking your IP address.
Perform OS restoration
Another equally effective way to get rid of the “Windows 10 could not automatically detect this network’s proxy settings” error is to roll back the operating system using the system restore function.
Here’s how to do it: Press Windows Key + S and type system restore in the search bar. In the new window, select Create a restore point and go to the System Properties window. Now, select the “System Restore” option, then follow the instructions to see a list of recent restore points. Select the “Show additional restore points” checkbox and select the desired restore point. Click Next and follow the on-screen instructions to complete the recovery process.
After rebooting the system, the error will no longer appear on your monitor screen.
SFC
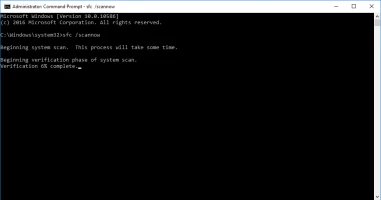
The SFC scan is done as follows: Open a command prompt as administrator and enter the following command:
sfc /scannow
Press Enter and the SFC scan will start (it takes about 10-15 minutes).
Then enter the command:
DISM / Online / Cleanup-Image / RestoreHealth
Press Enter and DISM Scan will start (it takes about 20 minutes).
After double scanning, restart your computer and check if the problem is resolved.
Troubleshooting
To scan your system using this built-in tool, first, open the Settings app. Then go to the Update & Security section and, on the left pane, select Troubleshoot. Next, open the "Network Adapter" section on the right pane and click "Run the troubleshooter". Then follow the instructions on the screen to complete the system scan. The problem should now be completely resolved.
You can restore and protect any of your data using special software
However, it is necessary to take all responsibility when choosing a program for data recovery because the result depends on it. DiskInternals Partition Recovery is developed by professionals and can recover up to 99% of lost files after formatting, virus attack, accidental or deliberate deletion, hard disk damage, operating system errors in various situations, etc.
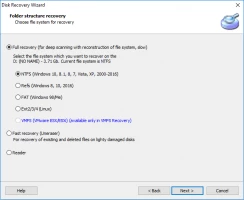
The program works with many file systems: HFS, NTFS, FAT, ReFS, UFS, EXT2/3/4, ReiserFS, etc. It scans and searches for data on every partition on your hard drive, producing amazing results. To use this software, you need to download and install it on your computer or laptop. The application will be sequentially placed on your computer, and the built-in simple and convenient Recovery Wizard will do the rest for you.
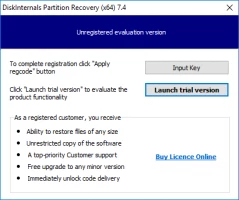
For the convenience of customers and understanding of the recovery process, DiskInternals has developed a free promotional version that you can use right now or at any time convenient for you.
Instructions for getting familiar with DiskInternals Partition Recovery are, of course, included:
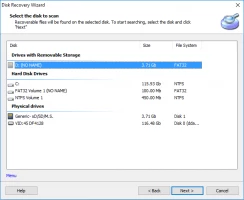
- Download and install DiskInternals Partition Recovery and automatically launch the Recovery Wizard. You need to select the partition on the hard drive that you want to recover, as well as the basic data search parameters (file type, scan mode, etc.).
- The scanning process will start; wait for it to complete.
- Free preview and recovery for each client are provided even in the trial version of the application.
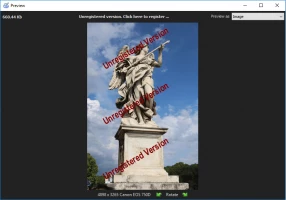
- To export the recovered files, you just need to buy a license for DiskInternals Partition Recovery. Then all you need to do is follow the detailed instructions of the Export Wizard. The whole recovery process will not take you much time and effort - everything happens exclusively automatically; good luck, you will definitely succeed!
