Windows 10 is not detecting a second monitor? Fix it now!

Here you will find out:
- how to fix 'second monitor not detected by Windows 10' issue
- how DiskInternals Partition Recovery can help you
Are you ready? Let's read!
About 'Windows not detecting second monitor' issue
Two or more monitors on a computer are often required to get more workspace and improve productivity. However, in Windows 10, there may be a problem with connecting two monitors. Quite often, users complain that Windows 10 cannot detect one of the two connected monitors, namely:
- Windows 10 cannot detect the second screen.
- Windows 10 cannot detect HDMI and VGA monitors.
- Windows 10 cannot find my second screen.
- Windows 10 second monitor not working.
- The second monitor does not recognize Windows 10.
- The second Windows 10 monitor keeps shutting down.
In such situations, the second monitor flickers turn black, falls asleep for an unknown reason, etc.
Let's deal with this problem with the help of this article.
Work with drivers
Update the display driver first, as the problematic driver is the cause of the “not detecting the second monitor”.
There are several ways to do this:
- 1. Go to the official website of the video card manufacturer. Next, find your graphics card and download the latest drivers for it. After installing them, restart your computer and try to reconnect the monitor.
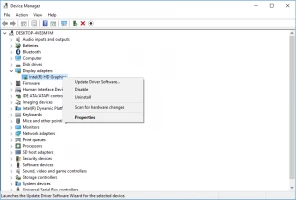
- 2. Go to Device Manager (right-click the Start button and select Device Manager) and locate your display adapter. Next, right-click it and select "Update Driver". Then just follow the instructions to complete the process you started.
- 3. You can also use a third-party application to update your display drivers, which will automatically download and install new drivers on your computer.
If updating your drivers did not help, or you have recently installed the latest driver, roll back to the older driver.
To do this, go to the Device Manager, find your display driver, and right-click on it. Next, select Roll Back Driver and follow the instructions on the screen to go to the previous version of the driver.
Alternatively, you can try to uninstall the driver and use the one that is installed by default.
This method is most suitable when the problem was caused by the IDE ATA /ATAPI driver.
Open Device Manager, right-click the display driver, and click Uninstall. Next, select the Uninstall driver software for this device checkbox and confirm your decision.
Then feel free to restart your computer (during this process, the default driver will be installed).
Turn off graphics adapter
Try this workaround if the previous method was not effective in solving the “not detecting second monitor” problem.
It is about disabling the graphics adapter for a while.
To do this, open the Win + X menu and select Device Manager.
In the new window find your graphics adapter, right-click it.
Select Disable device from the list provided. Confirm the changes by clicking on Yes. After a minute and again, right-click on the display adapter and click on "Enable device". This should help identify your second monitor.
Change display preferences
You can also try to look for the cause of the problem in the monitor. To do this, it offers to change certain monitor settings. First, change the monitor frequency.
In the app Settings(press Windows Key + I), go to the System section. Next, find and open the "Multiple displays'' section and click "Display adapter properties". On the tab, Monitor set the refresh rate to 60Hz and click OK to save your changes.
If you find that your monitor is already set to 60Hz, select a different value. Then immediately set it back to 60 Hz or use the frequencies recommended by the manufacturer. After restarting your computer, you will be able to use the second monitor.
Also, adjust the resolution of your external display to use a lower resolution than your computer. Keep in mind that if this method is effective, you will have to change the resolution every time you want to use a second display.
So, click right-any empty space on your desktop and select Display Settings. Next, go to the tab "Resolution" and reduce the resolution until the external display starts working.
Look for OS updates
You may not have the latest updates installed Windows And this is preventing the second display from being detected.
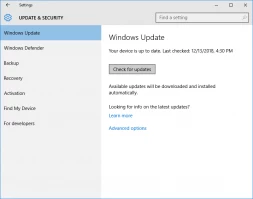
You need to do the following: Open Settings and go to Update & Security. In the new window, click on the button Check for Updates; Windows will automatically check for available updates and also automatically download them in the background. These updates will be installed after restarting your computer.
Do not neglect this method, as Microsoft is constantly improving its system and follows the timely correction of emerging errors. Therefore, it is likely that the latest system update has a solution to the “Windows 10 didn't detect another display” problem.
Windows + P
The “Windows not detecting second monitor” problem occurs due to the wrong project mode. If the project mode was only set for the second screen, this often results in the first screen not being detected.
This situation is very easy to solve: simultaneously press the Windows Key + P keyboard shortcut and select the desired project mode from the menu. Typically, for both monitors to work, you need to select the "Expand" or "Duplicate" options.
Make sure your essentila data is safe if you need to reinstall OS
The answer to this question is also simple: download and install the professional application DiskInternals Partition Recovery on your computer. With this application, you can not only recover data but also create a disk image.
The program has high potential due to deep scanning of each disk partition, so as not to miss a single lost file. It is also possible to convert any selected file system if it is damaged (FAT, ReFS, UFS; HFS, NTFS, ReiserFS, APFS (reader mode), RomFS (reader mode); Reiser4, XFS, Ext2, Ext3, and Ext4). Forget about recovery limitations: you can recover up to 1 PB of data in any format.
Also, after any scan (full or superficial), you can see each found file in reading mode for free. Then, at any time, you can buy a license here, with the subsequent storage of data in the right place at any convenient time. DiskInternals Partition Recovery also offers a free option to create a disk image in case of an emergency; you can save the system configuration (along with all data) to another device. Later, if you want, you can apply this disk image to your new computer.
Instructions are attached:
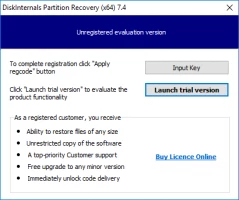
- 1. Download and install DiskInternals Partition Recovery from here.
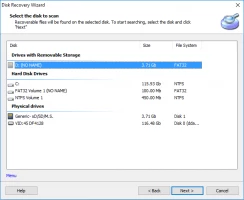
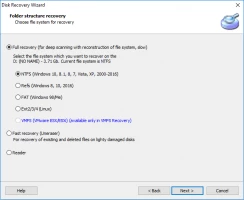
- 2. Select the basic options to search for data from a damaged hard drive (the Recovery Wizard will help you with this).
- 3. Select the scanning mode: "reader", "uneraser" or "full recovery" (recommended); click "Next.
- 4. Next, the scan will start, which will take some time.
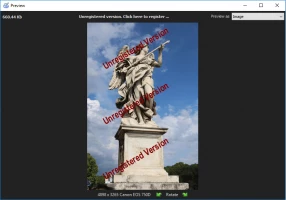
- 5. Preview and restore. Right-click the file and select “Preview in a new window.” After this step, you will be sure that your data will be recovered properly.
- 6. If you want to save the recovered files from your hard drive, just buy a license and enter the license key; the program itself will ask you to choose a location to save the data.
Good luck!

