Here is how to fix Service Host Sysmain issues
If you notice that your computer is slow, then you are experiencing performance problems and high disk utilization. In addition, many users reported that Service Host SysMain is also one of the reasons that cause high disk usage problems in Windows 10. This service is a set of system processes that optimize the launch of applications and also help them start faster. In some cases, it is service hosts: SysMain, on the contrary, slows down the launch of applications, causing high disk and processor load.
This article will be specifically about this problem, or rather, about how to get rid of the service host SysMain high disk.
In this article you will find out:
- how to deal with Service Host Sysmain high disk usage
- how to protect your data
Are you ready? Let's read!
Service Host Sysmain high disk usage fix is easy
Here are few methods that can be helpful and any of them can be your solution.
Try the stopping process
There are several ways to stop this process:
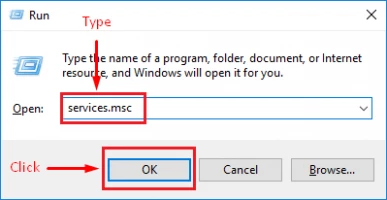
- 1. Press the Windows key + R, enter services.msc and click OK. In the new Services dialog box, find SysMain and right-click it. Next, select Properties, click the Stop button, and then the button OK to save your changes. After the system reboots, open the task manager and check the disk usage. This way you can verify that the service host's Sysmain high disk problem is gone.
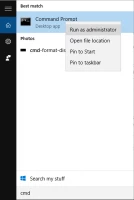
- 2. Use Command to get rid of the PromptSysMain high disk usage problem. To complete this, click Windows and enter cmd. Next, click "Open", then be sure to select "Run as administrator." In the Command Prompt window enter: SC stop "SysMain" and sc config "SysMain" start = disabled, press Enter. As a result, a message will appear on the screen: “Successful change of service configuration.” Now you can also open Task Manager to check disk usage.
- 3. Use the Registry Editor to fix high disk usage. To complete this, press the Windows key + R, enter regedit and click OK. Once the Registry Editor opens, navigate to the following path: HKEY_LOCAL_MACHINE \ SYSTEM \ CurrentControlSet \ Services \ SysMain and press Enter. Change the data value to 4 and click OK to save the changes. After you close the registry editor, start the task manager and check if the problem is resolved.
Examine the disk
The service host SysMain 100 disk problem often occurs when the main system processes are running in the background.
However, for a solid-state drive, this does not matter: processes in the background will not affect the performance of the computer. Therefore, if your Windows computer has a traditional mechanical hard drive and disk boot issues, it is highly recommended that you upgrade to a solid-state drive if you are using a laptop, it is most likely equipped with M.2 for installing an NVMe solid-state drive. But, in any case, you can buy a separate container to install the SSD on your old laptop or computer.
Update OS
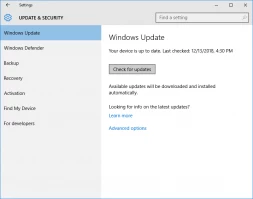
If your system is not configured for automatic regular updates of the main components, then it is possible that it is already outdated and causes high disk usage. Therefore, click "Start" and select the "Settings'' section. Next, go to the Update & Security section and check for any available Windows updates.
If there are any, then install them. After successfully installing the updates, restart your computer and check the performance of your computer.
Correction “service host SysMain high disk” threatens to lose your data (photos, videos, music, documents, etc.)
This is not always the case, but everyone needs to keep this in mind and be prepared for such a situation if you care about your data, and you will need it in the future. DiskInternals offers to use one of its best software for this purpose - Partition Recovery.
This application scans any of your disks (portable, stationary) for partitions and extracts absolutely all inaccessible information. At the same time, the program gives you the opportunity to view the found information for free before restoring. Overall, DiskInternals Partition Recovery is easy to use; even the most inexperienced PC users can figure out all the stages of recovery. An excellent Recovery Wizard (and there are several of them, depending on the selected file system) will make everything available for exporting data.
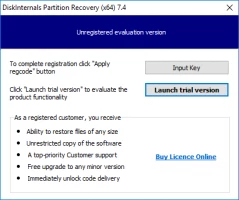
It should be noted that there are no restrictions on file size and recovery volume, unlike other similar offers. As for export, there are no obstacles here either: select the export drive connected to your computer and download all the recovered information. It should be remembered that before exporting, you need to download the trial version here and buy a license for a small fee. Don't worry, it only takes minutes.
Use the guide following to recover data of any format using Partition Recovery:
- 1. Download and install DiskInternals Partition Recovery.
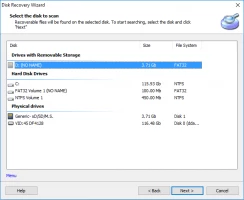
- 2. Select the basic options to search for data from a damaged disk, the Recovery Wizard will help you with this.
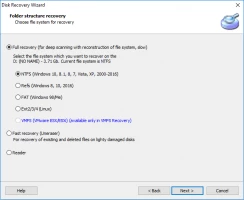
- 3. Select the recovery mode: "Reader" (opens inaccessible files as in Explorer), "Uneraser" or "Full Recovery" (recommended), and click "Next".
- 4. Next, scanning will start, which of course will take some time, this is normal.
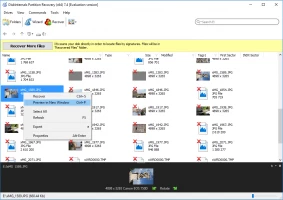
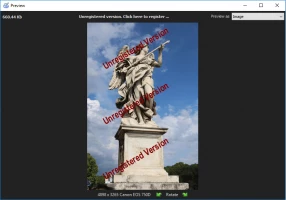
- 5. Preview and recovery. Right-click on the file with the red cross in the upper-left corner and open it in a new window.
- 6. Now, as mentioned above, just buy a license and enter the license key yourself. The program will ask you to select a location to save the data and load the found and recovered files there.
