What should you do in case of Distributedcom 10016 error?
In this article you will find out:
- how to get rid of this issue
- how to protect your data
Are you ready? Let's read!
About Distributedcom error 10016
If your personal computer has Windows 8 or 10, you may have encountered Distributedcom error 10016. This common error means that the account administrator does not have rights when the application is about to start the DCOM server. For your information, even after the update system, it is not possible to remove the Distributedcom error 10016.
One of the best ways to solve the problem is to delete certain keys in the registry. Agree; it is quite unpleasant when you constantly encounter an error pop-up window containing APPID and CLSID while working on a PC. The APPID and CLSID character strings are required to grant permission for specific applications and are unique. Most likely, the DCOM error will not lead to fatal damage to the OS, but you need to get rid of it since data loss is possible in this case.
Configure registry
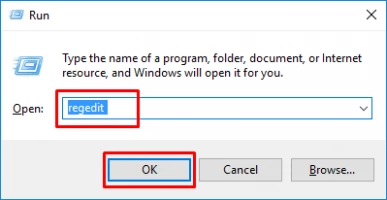
First of all, to solve the distributedcom error problem, you need to delete four keys from the registry. This will cause additional applications to access the DCOM server as a result. To achieve the goal, follow these steps in stages: Open the command line by holding down the hotkeys Win + R. Here, type the Regedit command and confirm by clicking on OK.
A registry window will open, then navigate to HKEY_LOCAL_MACHINE \ SOFTWARE \ Microsoft \ Ole. Find the following keys Default AccessPermission, DefaultLaunch, Permission MachineAccessRestriction, and MachineLaunchRestriction.
Before you delete them and change the registry values, it is highly recommended to make backups to avoid errors in the OS in the future. Do not forget that you need to perform all the above actions in administrator mode; otherwise, the changes will not take effect after restarting the computer.
Turn on permissions
To enable sufficient permissions, use the key combination Win + R. This will take you to the command line; rerun the Regedit command. The already familiar registry window will open. Find the HKEY_CLASSES_ROOT \ CLSID section in it. Next to the section, click on the triangle and expand it. There is a folder called CLSID.
You can recognize it because the same CLSID attribute was in the distributedcom error window. Right-click on this folder and look at the top half of the window for the owner. Change the owner name to the Administrators group. Check the box at the bottom of the window next to Replace all child object permission entries inherited from this object. An operating system security warning window will open; just click OK. Next, in the Security column, click on the Add tab. In the window that opens, type "All" below the list of users and confirm.
In all fields, click Allow to save the changes. Now, you need to locate and expand the HKEY_LOCAL_MACHINE \ Software \ ClassesAppID \ regedit folder in the registry list. There is also a folder called APPID. The same APP ID attribute was in the dcom errors window. As with the CLSID, check the Replace all child object permission entries at the bottom of the window. Confirm in the OS Security window. Click on the "Add" tab and type "All" in the box below the list of users, and then click on "Allow". Confirm all changes by clicking on Ok. Now, the registry subkey will be displayed, and its name will be similar to the name of the service that caused distributedcom error Windows 10.
Click on the Windows icon in the lower-left-hand corner and open the Control Panel. Change the view in the upper-right-hand corner to display icons. Find "Administration" and go to "Component Services". Right-click on the application that caused the problem and open "Properties" and then "Security". If you have carefully gone through all the points above, click "Configure" and then "Permissions for launch and activation", "Permissions for access", and "Permissions for configuration".
In the "Launch and Activation Permissions" section, left-click on "Change". Select "System" from the list of users. Otherwise, if it is not there, click "Add" and type "System" and press "Enter". Click "Allow" in the "Local launch" and "Local activation" lines.
Remember to save your changes step by step. Change the values in the Access Permissions and Configuration Permissions sections in the same way. As a result, you will find different meanings for the ClSID and AppID character strings. Be sure to repeat these steps for all events listed in the event logs. It is obligatory to complete everything successfully by restarting the operating system.
Protect your data
DiskInternals Partition Recovery is a modern, practical application that is indispensable for ordinary users and professionals to recover deleted or damaged files and folders on devices. The program supports recovery functions on almost all SSD, HDD, flash drives, IDE drives, memory cards, SATA drives, SCSI drives, external hard drives, etc. With this program, you can solve your problems very quickly and efficiently. Why might your data be lost or damaged? This may be accidental deletion; for example, you get distracted and mistakenly delete the document you need by irrevocably pressing the Ctrl + Alt + Delete key combination. Or, due to a system crash, your Windows cannot open the partition normally.


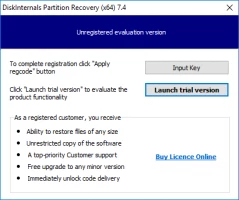
This also includes damage to your data by malware and viruses. Even a power outage can damage the media. You may not believe it, but you can still recover valuable information for yourself on the device even in such difficult situations. To do this, you need to take responsibility for choosing a file recovery program. Just download a trial version of DiskInternals Partition Recovery from the official website, and don't worry about anything.
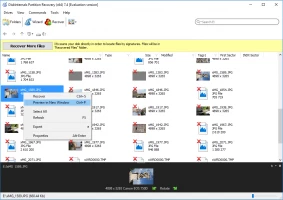
The Recovery Wizard will open automatically. Don't worry; the wizard will accompany you through all stages of your recovery. Select the disk partition where the deleted files or folders are located, as well as the "fast recovery", "full recovery" or "reader" mode. Start the scanning process. Thanks to the special feature of DiskInternals Partition Recovery, you have the opportunity to eventually see the data found. Buy a license key, enter it in the corresponding field and enjoy the recovery. In the end, save the data in a disk partition of your choice and no longer worry about losing valuable information. Good luck!
