How to Fix an Issue when CPU at 100% all the time on Windows 10, 11
Here you will find out:
- why on Windows 10, 11 CPU at 100% all the time
- methods of how to fix it
- how DiskInternals can help you
Are you ready? Let's read!
About the “Windows 10, 11 CPU at 100% all the time” issue
When a Windows 10 CPU is at 100% all the time, you may start to worry a lot. It has a good explanation: the less heat on the processor, the faster and more efficient the operating system (i.e., can quickly open applications, files, and folders). Therefore, it is very important that the processor does not run at 100%. Most often, Windows 10 CPU at 100% all the time is the result of the consumption of all processor resources by a certain program or service.
Also, do not forget about system failures or other surprises.
Here on this page, you will find comprehensive information on solving this problem and much more useful and truthful information.
Method 1. End some processes in Task Manager
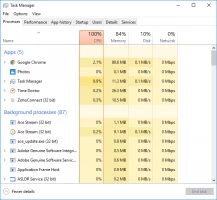
Launch the Start Menu. Select "Run" and enter “Taskmg”. Click OK and you will see the desired window. Next, on the "Processes" tab, move the mouse to the program that you want to remove. In this case, you must be sure that these tasks are not needed.
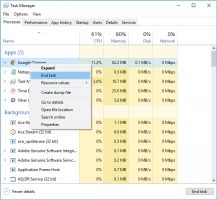
Then, right-click on them and select “Remove task”; the process (program) will be completed.
Watch now how the computer works and how much the computer is running.
Method 2. Run antivirus
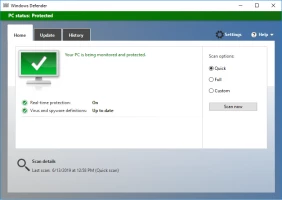
Viruses can do many unpredictable things, so run an antivirus program and scan the disk.
Before that, make sure that your antivirus is not only good but also has the latest updates. If not, fix it using the official site of the manufacturer of the antivirus program.
After scanning, restart your computer and see if your Windows 10, 11 CPU is running at 100% all the time or not.
Method 3. Reset Power options
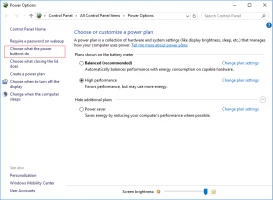
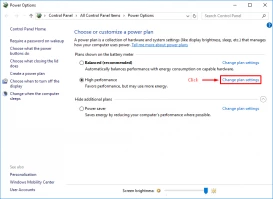
Energy-saving mode always harms computer performance, so this should be avoided if possible. Also, set the initial plan settings; this can fundamentally affect the problem of “Windows 10 CPU at 100% all time”.
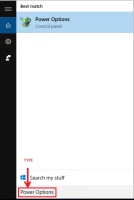
All this is in the Control Panel, where you need to click on Hardware and Sound, and then click Power Options. Here, change the mode and configuration plan to the default.
Method 4. Restart Application Management
This method is quite new and there are not enough reviews, but it's worth a try, especially since it’s not complicated or long.
From the Start menu, select Services. Right-click on Application Management and select Restart. These actions will help to deal with the errors that have reduced the performance of your PC.
In the event that this method is not suitable for you, the following option should be considered.
Method 5. Turn off notifications
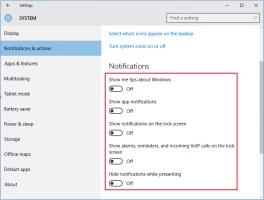
You can receive a huge number of notifications from various programs, and this requires huge resources from the computer, so the processor will eventually run at 100%.
These notifications can be turned off and the problem will be solved instantly. In Computer Preferences, select System. Here you need to select the correct section — Notifications. Here, simply deactivate automatic notifications from any program.
For greater certainty, restart your computer and see instantly improved performance.
Method 6. Turn off peer-to-peer file sharing
Disabling p2p distribution of updates in Windows 10 is very simple, so if you do not need it, do so and you can free up a lot of space. This can be done in a few steps:
- 1. Open a new (second) control panel, (or "Parameters")
- 2. Select "Update and Security"
- 3. Then "Advanced Options"
- 4. Now select "Choose how and when to receive updates"
- 5. Set the switch to "Off"
- 6. Reboot the computer
After that, there will be no problems with the processor, but if you did not find any files after overloading it, you will need method 7.
Method 7. Do you need to restore some data
High processor utilization can cause a system crash, and all your files may be lost.
Use DiskInternals Partition Recovery to view files or restore them. By downloading and installing this application, you will no longer be afraid that your photos, videos, documents, music, etc. will be lost; you will be under the reliable protection of DiskInternals Partition Recovery.
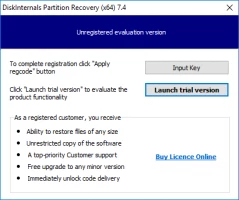
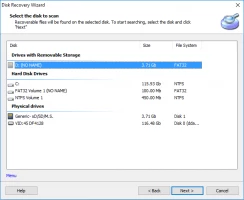
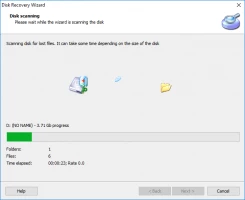
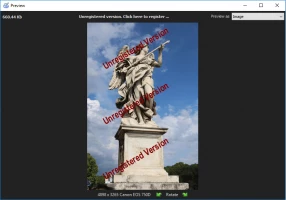
Searching and scanning of the hard drive occur at the deepest level while examining each partition individually. The program does not limit you of how much you can recover and also gives you the opportunity to view the found files for free. For beginners, a Recovery Wizard has been developed, which is adapted to different file systems and helps you with all stages of data retrieval. A license is required only at the last stage of exporting files.
Related articles
- Fix 0x80080008 Windows Update Error⠀
- How to Fix Error Code 0x80070422 in Windows 10⠀
- 0x80070005 Windows 10 - How to Fix the Windows Access Denied error⠀
- Partition loss problems on Windows 10?
- How to Fix the Windows Update Error Code 0x80240fff in Windows 10⠀
- Fix Windows Update error 0x80080005⠀
- [Windows 10] Format flash drive to FAT32
- How To Fix Windows 10 Update Error 0xc1900107?⠀
- FIX: Error 0x80240034 in Windows 10 Update⠀
- Error 0x80070570: The File or Directory Is Corrupted or Unreadable - Fix it⠀
- How to Fix Windows Update Error 0x80070057?⠀
- Fix: Windows Update Error 0x80070424⠀
- Fix Windows 10 Update Error 0x8024a105 in 2022⠀
- Fix Update Error Code 0x8007001F in Windows 10⠀
- What should you do in case of the ‘Device not migrated’ issue?
- Fix 100% Disk Usage in Windows 10⠀
- Fix 0xc0000225 Error Code on Windows 10⠀
- Whea_uncorrectable_error windows 10 - Fix it⠀
- Fix error 0xc004f074 in Windows 10⠀
- How to Fix Error Code 0xc0000428 BSOD on Windows?⠀
- Fix Windows 10 Error code 0xc0000034⠀
- 0x00000109 Error Blue Screen - 5 Steps to Fix it [2022]⠀
- Methods to Fix Stop 0x000000f4 Blue Screen Error [2022]⠀
- Fix 0x80070002 Windows Update Error ⠀
- Error code 80070490: how to deal with this issue
- How to Fix Windows Update Error 0xc19001e1⠀
- How to fix Windows Store error code: 0x803fb005?⠀
- How to fix black screen with cursor in Windows 10/11?⠀
- FIX: Error 0x80240034 in Windows 10 Update⠀
- Fix error 0x80131500 now!
- Fix blue screen stop 0x0000003b [2022]⠀
- How to Fix Windows Store Error 0x80073cf9?⠀
- Fix: Windows Update error code 0x800706ba in Windows 10⠀
- FIX: Windows Defender error code 0x800704ec⠀
- How to fix Windows Update Error 0x800703e3⠀
- FIX: Windows Cannot Install Required Files 0x8007025D⠀
- Windows 10 update 0x800705b4 - Fix error code⠀
- 6 Signs Your Hard Drive Is Failing⠀
- How to Fix: Windows Detected a Hard Disk Problem⠀
- How to Unformat Hard Drive in Windows 10⠀
- Detailed guide on how to format a write-protected USB drive
- Hard Drive Repair and Bringing Files Back
- Windows was unable to complete the formatting? Cope with the problem!
- Get rid off error loading operating system
- [Error] WD Passport Not Recognized
- Solutions for "Bootmgr is Missing" Issue
- How to repair SATA Hard Drive?⠀
- How to Repair Virtual Disk VHD file⠀
- How to Fix Bad System Config Info Error
- Issue: Couldn't Create a New Partition or Locate an Existing One
- How to Cope with Dell Error Code 2000 0141
- Windows 10 stuck at getting windows ready⠀
- Accidentally Formatted/Deleted Recovery Partition, How to Recover? - DiskInternals
- Quick Fix SSD Not Showing up in Windows 10⠀
- What should you do if you can't reset your Windows 10, 11 OS?
- [Windows 10, 11] There was a problem resetting your PC error
- What should you do if Bluetooth audio stuttering occurs in Windows 10?
- What should you do if Chrome keeps crashing Windows 10, 11?
- What should you do if the Windows 10, 11 Start button is not working?
- Easy and workable tips on how to change directory in cmd Windows 10, 11
- How to boot Last Known Good Configuration on Windows 10, 11
- How to restore Windows 10, 11 system: only workable solutions
- If Windows 10, 11 doesn't recognize hard drive
- How to uninstall Windows 10, 11 update without data issues?
- The Invalid partition table error on Windows 10, 11
- Best ways to disable startup programs in Windows 10
- If you want to stop Windows 10 update in progress
- What to Do if the Second Monitor is Not Detected in Windows 10, 11?
- Here is how to create and use a restore point in Windows 10, 11
- Make a Windows 10, 11 bootable disk
- Learn how to deal with bad pool caller error in Windows 10, 11
- How to Fix Windows 10, 11 Explorer.exe Errors
- How to Use a Duplicate File Finder in Windows 10
- Fix Windows 10, 11 dwm.exe Error Now
- What should you do if Windows 10, 11 backup is not working? Step-by-step guide
- What to Do if You Can't Remove Bluetooth Devices in Windows 10, 11?
- Windows Media Player server execution failed in Windows 10, 11: your actions?
- Fix dpc_watchdog_violation Windows 10, 11 Error Now!
- Here is how to deal with Localbridge.exe error in Windows 10, 11
- Here is how to interact with File Association Helper in Windows 10, 11
- How to fix the Windows 10, 11 that won't shut down
- How to use dual boot on Windows 7 and 10 safely?
- What to Do if Alt-Tab is Not Working in Windows 10, 11
- Here is everything you need to know about twinui in Windows 10
- What should you do if the cumulative update for Windows 10, 11 version 1909 failed?
- What to do if Windows 10, 11 Remote Desktop is not working?
- If Windows 10, 11 wont boot after update
- How to provide a memory test in Windows 10
- What to Do in Case of 0x803f7001 Windows 10, 11 Error
- How to Fix Windows 10, 11 Unidentified Network Issue on Cable Ethernet Connection?
- What should you do if you forgot your Windows 10, 11 password? Only workable hints
- What should you do if ‘How to get help in Windows 10’ message keeps popping up?
- Here is how to change administrator on Windows 10, 11 safely
- New hard drive not showing up in Windows 10? The best solutions are here!
- If you cannot login to Windows 10, 11
- How to Perform a Clean Boot on Windows 10, 11 and Keep Your Data Safe
- What should you do if sound is not working in Windows 10, 11?
- Stop Windows 10, 11 from Restarting: The Best Methods!
- Here is How to Update NVIDIA Drivers in Windows 10, 11
- Make your computer faster! Windows 10, 11 refresh
- How to disable UAC in Windows 10, 11? Think about whether you need to do it or not
- Change Drive Letter in Windows 10, 11 Easily and Safely with This Guide
- Windows 10, 11 Action Center is missing: your actions?
- What to do if Bluetooth is Not Working in Windows 10, 11
- Here is how to fix Windows 10, 11 video scheduler internal error
- About Windows 10, 11 recovery mode
- How to boot into Windows 10, 11 safe mode properly?
- What if Chrome didn't shut down correctly in Windows 10, 11?
- When This PC can’t be upgraded to Windows 10, 11 issue appears
- Here is how to create or remove Administrator Account in Windows 10, 11
- If Windows 10, 11 stuck before login screen
- How to work with Windows 10, 11 on ARM
- What to Do in the Case of Windows 10, 11 Start Menu Critical Error?
- Here is how to clean Registry in Windows 10, 11
- Windows 10, 11 won't update
- How to use Windows 10, 11 compatibility tester properly
- Here is How to Deal With Windows 10, 11 Yellow Screen Issue
- Step-by-step guide on how to auto login Windows 10, 11
- How to Backup in Windows 10, 11?
- If the folder has disappeared in Windows 10, 11
- If Windows 10, 11 Installation is Stuck
- What should you do if Windows 10, 11 settings won't open?
- Here is how to reset Windows 10, 11 with no harm to your data
- When you need to format the Windows 10, 11
- [Windows 10] Critical process died? Fix it!
- How to fix ASUS motherboard not detecting SATA hard drive issue
- Repairing of Corrupted Hard Drive
- USB device not recognized? The solutions are here!
- Black Screen of Death and How to Fight It
- About “The File System Type Is RAW” error
- Fix 0xc00000e9 error in Windows! The best solutions
- Windows cannot access the specified device? Fix it!
- The best, most reliable software to recover files from a corrupted hard drive
- Unlock: The drive where Windows is installed is locked
- If the directory name is invalid
- Merge partitions in Windows 10
- How to unpartition a USB drive
- Why the Hard Drive Clicking Happens and How to Fix It
- Why has Partition Recovery replaced Fat Recovery and why is it better?
- Top 16 Best Partition Recovery Software in 2021
- Change a boot drive in Windows 10
- What causes lead to a hard drive fails?
- Need to Install Windows 10 on the External HDD?
- Need to flush DNS cache? Learn how to do it safely
- 0xa00f4244 error occurs: your actions?
- Learn how to update BIOS in this article. It will take less then 10 minutes!
- Guide on How to Repair Windows 10, 11 Without Harming Your Data
- Reset to device,\device\raidport0, was issued
- Here is How to Find and Change iTunes Backup Location on Windows 10
- PS4 database is corrupted? Fix it now!
- What to do if PS4 safe mode is not working?
- Here is how to use external hard drive on PS4
- Here is how to fix Wldcore.dll issues
- Here is everything you need to know about DRAMless SSD
- What to do if the Control-Alt-Delete combination is not working?
- Best command prompt tricks to use in data recovery
- What to do if the touchpad scroll is not working?
- What to do if 'You must enable system protection on this drive' message appears?
- Here is how to factory reset Surface Pro
- Here is how to use PS4 extended storage
- What to do if Desktop icons keep moving after OS restart?
- What to do if Chromebook won't turn on?
- How to interact with Removable Storage Devices Folder?
- What to do if 'Failed to enumerate objects in the container' error occurs?
- Here is Everything You Need to Know About CLI
- Here is How to Interact with HxTsr.exe
- Here is Everything You Need to Know About Server Message Block Protocol
- How to Use Win32 Priority Separation with No Harm to Your PC and Data?
- What to Do if a Folder with a Question Mark Appears on Mac?
- What to Do if YouTube Audio is Not Working?
- What to Do if Chrome OS is Missing or Damaged?
- Can't Restore Mac from Time Machine? Use This Article as a Guide
- Recover Lost or Deleted Partition
- Recover Overwritten Files: All You Need to Know
- Show hidden files in Windows 10
- An algorithm, if file record segment is unreadable
- PC randomly freezes? The solutions for Windows!
- Error: irql_not_less_or_equal on Windows 10? Not a problem!
- HDD Data Recovery from Unallocated Space
- Bad pool header and how you can deal with it
- [Error] The volume does not contain a recognized FS
- If the Computer Freezes When Playing Games
- How to disable MS compatibility telemetry on Windows10
- Partition Recovery Guide in pictures
- Fix the Issue: We Couldn't Update the System Reserved Partition
- Drive is Not Accessible? You Can Fix It!
- Windows doesn't have a network profile for this device? Fix it now!
- 0xc1900223 error occurs: your actions?
- How to Unpartition an External or Internal Hard Drive
- Everything you need to get rid of 0x80072ee2 error consequences
- 2000-0146 error occurs: your actions?
- How to stop the "Code Kmode Exception Not Handled" issue
- How to use the DIR command correctly?
- How to run Windows memory diagnostic?
- How to Deal With Win32: Bogent Threat Without harm to Your Data?
- GPT partition style
- What should you do in case Windows 10 quick access is not working?
- What should you do in case Steam won't open?
- How to reset BIOS
- Here is how to disable Cortana without any harm to your data
- How and for which reason you should clean up WinSXS folder on Windows 7, 8?
- Right-click not working
- Critical error your Start Menu isn't working
- SFC Commands Review
- Everything you should know before installing a new KB5001330 Windows 10 update
- What should you do in case of Steam Disk Write Error?
- Fix Windows 10 green screen error now!
- What should you do if error 0x80070003 accompanies system restore?
- “Is it possible to fix the reallocated sector count issue
- Here is everything you should know about Runtime Broker
- What should you do if a ‘side by side configuration is incorrect’ error occurs?
- What should you do in case of ‘err_empty_response’?
- How to deal with rgss202j.dll error?
- What if you don't have permission to save in this location in Windows 10? Quick fix
- Here is everything you need to know about AppVShNotify.exe
- How to fix error code 0x80070035?
- How to uninstall Microsoft Edge and keep your data safe
- Here is everything you need to know about Vulkan Runtime Libraries
- Here is how to disable Software Reporter Tool
- ‘Application has been blocked from accessing graphics hardware’ error occurs: your actions?
- The program can't start because msvcr71.dll is missing: how to deal with this issue?
- What is unsecapp.exe, and how should you interact with it?
- Windows could not automatically detect this network's proxy settings - what should you do?
- Is Searchui.exe still running even after you disable it? What should you do about it?
- How to disable igfxtray with no harm to your data?
- What should you do if you see this: 'The code execution cannot proceed'?
- Here is how to move OS to SSD using system options
- Brief guide on how to secure your data while dealing with 2000-0151 error code issue
- 5 tips on how to get rid of dev error 6068 with no harm to your game progress
- Here is how to fix ‘Xbox Console Companion is not working’ issue
- This App Can't Run on Your PC? Fix it now!
- Fix dxgmms2.sys error now!
- Unexpected Store Exception issue occurs: your actions
- Speakers Failed to Play Test Tone in Windows 10? Fix it Now!
- What should you do if Windows Update Service is missing?
- 0x80070570 error occurs: your actions
- Windows Memory Diagnostic Tool Stuck? Fix it Now!
- What is WaasMedic.exe?
- File Explorer not opening: how to fix it?
- The remote device won't accept the connection? Fix it now!
- Your location is currently in use: how to fix this issue?
- What to Do if Steam is Not Updating Games
- This PC Can't Run Windows 11. Fix it Now!
- What to Do if the Xbox App is not Working
- What to Do if APC Index Mismatch Stop Code Appears
- Windows Defender Blocked by Group Policy: Fix it Now!
- Here is How to Deal with System Error 5
- Fix Windows Connection Error 651 Now!
- The Active Directory Domain Services are Currently Unavailable: Fix it!
- How to interact with SysWOW64
- What to do in case the Client Server Runtime processes high CPU usage issues?
- Fix PS4 e-82106o4a error code
- Here Is How To Fix Net::Err_Cert_Date_Invalid Issue
- Here is how to restart Windows Explorer
- How to deal with The disk does not have enough space to replace bad clusters issue
- What to do if wireless capability is turned off
- What Should You Do in the Case of PS4 SU-30746-0, SU-42118-6 Error Codes?
- Here is How to Initialize SSD Properly
- Audio Services not responding: fix it now!
- Fix PS4 np-36006-5 issue now!
- Here is how to fix pr_connect_reset_error
- How to reset PS4 properly
- Here is how you can create a Windows 10 recovery disk from another computer
- SSD types: how to choose yours?
- Fix Searchprotocolhost.exe issues now
- Let’s compare: SATA vs NVMe
- Pfn_list_corrupt in Windows 10? Fix it now!
- Сorrupted Hard Drive - What To Do Now?
- [Solved!] External hard drive not detected
- Can't format an SD card? Solve your problem now!
- Unable to reset the PC: a partition is missing
- If You Cannot Access USB Drive on Windows 10
- Here is how to fix file system error -805305975
- Partition a hard drive on Windows 10
- Everything you need to know about 'Page fault in nonpaged area Windows 10' issue
- If you get DISM Error 87
- Here is what to do if Driver Verifier has detected a violation
- How to Deal with Error Code 0x80004002 in Windows 10?
- What to do if CANNOT START THE PS4 issue happens
- Solutions for Faulty Hardware Corrupted Page Error
- How to recover uninstalled programs
- GPT: What Is It Meaning?
- When network drive is not showing
- How to unlock the SD card and access the data
- Fix user profile service sign-in failure on Windows10 now!
- What to do in case of External Hard Drive I/O Error?
- What to do if a computer won't wake up from sleep in Windows 10?
- What to do if The Code Execution Cannot Proceed Because of Msvcp140.dll?
- What if 'Java' is not recognized as an internal or external command, operable program, or batch file?
- What if Windows Security asks to enter network credentials?
- Here is How to Deal With System Requires SMB2 or Higher Issue
- It looks like you don't have permission to save changes to this file. What to do?
- Here is What to Do if Windows Rollback is Not Working
- 'Driver overran stack buffer' error occurs. Your actions?
- How to deal with Windows Modules Installer Worker high CPU issues?
- Here is how to deal with 'Avchrome.dll is missing' issue
- ‘Dns_probe_finished_bad_config’ issue occurs: your actions?
- How to Install Windows 10 From a USB
- Why does wdf01000.sys BSOD error occur on my computer?
- What should you do if Windows can't find one of the files in this theme?
- [Solved!] USB drive not recognized. Only workable solutions
- MACHINE_CHECK_EXCEPTION error occurs: your actions
- How to fix ‘The code execution cannot proceed because xinput1_3.dll was not found’ issue
- How to Fix There are Currently No Power Options Available Error
- Error Code: 224003. Fix it Now!
- What to Do if You Can't Type in Windows Search
- Intel Optane Memory Pinning Error Occurs: Your Options
- The Action Cannot Be Completed Because the File is Open in System: Here is How to Fix it
- What to Do if the Wi-Fi Network is Not Showing Up
- What is IAStorDataSvc in Windows 10 and how to interact with it?
- Fix Windows update error 80073701 now!
- Instup.exe leads to high CPU usage? Fix it now!
- What should you do in case of 'err_cache_miss'?
- How to download KB4474419, KB4490628, and KB4484071 Windows 7 updates
- Here is How to Uninstall Segurazo
- Step-by-step guide on how to disable Driver Signature Enforcement in Windows 8, 10
- What is CompatTelRunner.exe and How to Interact With It
- What does Runtime error r6025 mean? What should you do to save your data?
- Everything you need to know about CRC SHA
- What should you do if Windows 10 is not detecting a second monitor?”
- Windows service registration is missing or corrupt: how to fix this error
- Dxgkrnl.sys error occurs: your actions?
- What is WMI Provider Host, and how should you interact with it?
- Pagefile.sys: what is Windows paging file?
- Everything you should know about error code 0xc1900101
- What should you do in case of srttrail.txt error?
- How to use registry editor?
- Mmc.exe: what is it and how to fix high CPU issue?
- How to edit boot.ini: step-by-step guide
- Should you delete hiberfil.sys file? How to disable hibernate mode with no harm to your data?
- What should you do if Windows 10 update deleted files
- What should you do in case of 'Windows resource protection could not start the repair service' issue?
- How should you interact with Service Host Sysmain if it causes high disk usage problems?
- Photoshop Scratch Disk is Full? Fix it Now!
- What should you do in case of ‘Antimalware Service Executable’ isn’t working correctly?
- Here is what to do if Origin game won't launch
- Bootrec.exe commands
- What should you do if the cursor disappears?
- This File Does Not Have a Program Associated With it For Performing This Action? Fix This Issue!
- What Should You Do if the Laptop Microphone is Not Working?
- Fix broken registry items
- How to find out why Windows 10 crashed: crash log
- Windows 10 defrag: here is everything you should know to successfully end this operation
- Everything about BOOTMGR is compressed: Press Ctrl + Alt + Del to restart error
- Steam Application Load Error 5:0000065434? Learn How to Fix It
- What should you do in case thumbnails are not showing in Windows 10?
- Your Folder Can't Be Shared: Fix it Now!
- What is NES emulator and how to use it right?
- Windows 10 file sharing not working
- Windows Defender won't turn on
- What if Windows 10 does not have a digital output device (HDMI)?
- What should you do if 'We couldn't install some updates because the PC was turned off' error occurs?
- [Solved!] Offline startup repair cannot repair your PC
- How to deal with the NET HELPMSG 2182 error
- What should you do to save your data when a 0xc0000185 error occurs?
- Computer turns on by itself
- Msvcp100.dll problem: fix it now!
- What to do if you run into the process1_initialization_failed issue
- 0xc0000017 error occurs: your actions
- What should you do if an isdone.dll error occurred?
- How to fix Kernel32.dll error
- How to get rid of error 0x80042302
- Thread stuck in device driver issue occurs: your actions?
- Fix 'Driver power state failure in Windows 10' now!
- Guide on how to activate partition
- Can't delete a file
- What should you do if Windows cannot find gpedit.msc?
- What should you do in 'Please login with administrator privileges and try again' issue?
- Advapi32.dll not found: what to do if this error occurs on your PC?
- How to deal with the 'you do not have permission to save files to this location' issue?
- Controller is Not Working on PC? Fix It Now!
- DirectX encountered an unrecoverable error? Fix it now!
- What should you do if headphones are not working in Windows 10?
- What should you do if laptop speakers are not working?
- Here is How to Deal with Steam 'Black Screen' Issues
- What Should You Do if a Steam Service Error Occurs?
- Here is How to Deal with Typical File System Errors
- What Should You Do if the Laptop Camera is Not Working?
- What should you do in case of the 'your device is missing important security and quality fixes' issue?
- What should you do if Steam is missing file privileges?
- PS4 Error Code ce-34788-0: Fix it Now!
- Fix Windows 10 error code 0x8000ffff now
- Fix Windows 10 error code 0x800704cf now
- Here is how to reformat Windows 10 safely
- How to move Steam games to another drive safely
- What To Do If You Cannot Extend Volume
- What does Steam games backing up do?
- Here is how to fix CMOS Checksum error in Windows 10
- What to do in case of Desktop Window Manager high memory usage?
- Here is how to stop OneDrive from syncing
- What to do in case of Xbox sign in 0x87dd0006 error?
- Here is how to rollback Windows 11 to Windows 10
- Here is How to Deal with the logilda.dll Error in Windows 10
- What to Do if USB Ports Are Not Working in Windows 10?
- What to Do in Case of an Orange Screen Issue in Windows 10?
- Hard Disk 3f0 Boot Device Not Found on HP: Fix it Now!
- Here is How to Fix Wrong Time in Windows 10
- Hard Drive Password Recovery: Everything You Need to Know
- Here is Everything You Need to Know About LaCie External Hard Drive Recovery
- SSD is not showing up in BIOS? Fix it now
- Windows Server 2019 editions
- SD card not showing up? Solutions are here!
- Learn about Legacy Boot Mode
- Windows Server 2016 Standard vs Datacenter
- Windows Server 2016 Essentials vs Standard
- Guide on how to get rid of bloatware in Windows 10
- How to enable hosted network support in Windows 10?
- The computer has rebooted from a bug-check: what does it mean?
- Taskbar icons are missing in Windows 10: Fix it now!
- Issue: You Don't Currently Have Permission to Access this Folder
- How to uninstall McAfee? What to do if it won't?
- JavaScript error occurred in the main process? Here is how to fix it
- File explorer is running slow? Fix it now!
- Need to recover a deleted folder? The solution is here!
- Blue screen 0x00000024 error on Windows? Solve it!
- Error 15 on Windows and how to fix it
- Make sure your data is safe while using IOS emulators for PC
- Windows stop code 0xc000021a and How to Fix It
- What to Do if You Get a wudfrd Failed to Load Error 219?
- What To Do If You Get a Microsoft Account Problem Notification
- Here is How to Fix Error 1603
- What if you can't copy and paste?
- How to Fix WerFault.exe Application Error in Windows 10
- How to Fix Confirm Form Resubmission on Refresh?
- Razer Synapse is Not Opening? Fix it now!
- Fix file system error 65535 on Windows fast&safe!
- What to do if Discord won't stop updating?
- Best Wii Emulators For Windows
- OneDrive is not syncing? Fix it now!
- What should you do if the Epic Games launcher is not working?
- Fix the Red Screen error now!
- Operating System Not Found or Missing? Fix it!
- If your PC ran into a problem and needs to restart
- Here is How to Deal With CLOCK_WATCHDOG_TIMEOUT Issue
- [SOLVED] Attempted to Write to Read-Only Memory Issue
- Scanning and Repairing Drive is Stuck | Windows10
- Solved: computer is sending captcha automated queries
- [SOLVED] Install an Operating System on Your Hard Disk Issue
- Everything you need to know about idp.generic virus to prevent data loss
- Protect your game progress while using the best Xbox 360 emulators for PC
- Here is how to interact with dllhost.exe
- What if You are Unable to Access Jar File?
- Here is How to Refresh Your Browser
- Mouse Double clicks? Fix it Now!
- Wireless Mouse is Not Working? Fix it Now!
- Here is Everything You Should Know About DISM Restore Health Tool
- Windows Resource Protection Could Not Perform the Requested Operation: Your Actions
- You Need Permission to Perform This Action: How to Deal with This Issue
- Top-3 PS4 emulators for PC
- What should you do if Discord screen share and audio are not working?
- What should you do in case of audio renderer error?
- Use best Dreamcast Emulators with no threat to your game progress
- Everything You Need to Know About KB4494441 Windows Update
- The code execution can't proceed because d3dx9_43.dll was not found error occurs: your actions
- Xlive.dll is missing: fix it now!
- What should you do in case of the atikmdag.sys error?
- Video TDR failure
- 0x00000B error occurs: your actions
- Fix the Issue: Can't Read from the Source File or Disk
- The default gateway is not available: what can you do?
- Here is everything you need to know about Windows Terminal
- How to delete files from OneDrive, but not computer?
- Get rid of ‘failed to transfer logged messages to the event log with status 50’ now
- ‘HAL initialization failed’: how to deal with such kind of error?
- What should you do in case of 0x80070780 error?
- Bootrec /fixboot access is denied error occurs: your actions
- ‘We couldn't complete the updates undoing changes’ error occurs: your actions?
- Here are all windows.com/stopcodes and here is how to fix them
- Distributedcom 10016 error occurs: your actions
- What should you do in case of ‘Folder keeps reverting to read only’ issue
- What to do when a CLASSPNP.SYS error occurs
- What should you do in case if d3dcompiler_43.dll is not found?
- What should you do if white screen of death appears?
- Let's deal with 'Exception Access Violation' error
- How to deal with ‘the operating system is not presently configured to run this application’ error
- Nvlddmkm.sys error: what should you do?
- Kernel mode heap corruption occurs: what you can do
- Here’s everything you need to know about $ windows. bt folder
- What to do with the kernel power 41 error
- What does “You need to format the disk in drive X: before you can use it” error mean?
- If you get a non system disk or disk error message
- Differential and incremental backups
- If your user profile is corrupted
- If you want to remove junk files on Windows
- If you get “we can't create a recovery drive” issue
- If you get the “Diskpart has encountered an error” issue
- What does event id 1000 mean?
- Step-by-step guide on how to work with Windows ink: connecting, customizing, disabling
- Having hard drive error code 2000-0142? Fix it!
- How to create and use guest account in Windows 10: guide
- If you want to delete Delivery Optimization Files
- If you get This File Does Not Have A Program Associated With It error
- If explorer.exe class not registered error appears
- If you get Windows Update cannot currently check for updates issue
- If you need to delete backup files in Windows
- If you get the Stop Code Memory Management BSOD Error
- If you want to fix the Windows Search not working problem
- If you want to remove OneDrive
- If you get error 0x80071ac3 code
- What to do with the Code 19 error
- If you get “store data structure corruption” problem
- What is 'Windows delayed write failure' and how to prevent this error?
- The folder is empty but files are still there| Windows10
- What should you do in case of 0xc000012f error?
- [Solved!] My computer stopped working. How to fix it?
- What should you do if 0xc0000409 error occurs?
- Code 45: what does this error mean and how to deal with it?
- If you get the error “Could not find the recovery environment”
- What should you do if netwtw06.sys error occurred
- [Solved!] Error code: 0xc004c003
- HKEY_LOCAL_MACHINE. What is that?
- If “Error Code 0x80004005. Unspecified error” appears
- If you get the error code 0x80080005
- Error Code 0xc0000005 in Windows 10? Fix it!
- What should you do if a ‘system thread exception not handled (bcmwl63a.sys)’ error occurs?
- What are Win dump files? Should you delete them to free up some disk space?
- If the program isn't closing: how to force quit?
- Windows update is stuck: how to easily and quickly deal with this issue
- Windows won't boot: what should you do in such a case?
- If the “NETIO.SYS” error appears
- What to do with “CRITICAL_STRUCTURE_CORRUPTION” error
- If you get “No Audio Output Device is Installed” error
- If “Windows key not working” issue appears
- Clear RAM on Windows 10
- How to use Windows partition manager correctly
- Reset Windows 7 to factory settings
- If you get 0xc0000022 application error
- How to Delete Temporary Files on Windows 8
- If you get the “Application was unable to start correctly (0xc0000005)” error
- The potential Windows Update database error detected message
- What to do if the PFN_LIST_CORRUPT error appears
- If you get NW-31297-2 error
- How secure is OneDrive
- Advanced Boot Options
- How you can initialize disk without losing data
- [Solved!] Folder access denied? 4 best methods!
- Cyclic Redundancy Check Data Error - Solve It!
- Windows Explorer Keeps Crashing. What to do next?
- What should you do if taskbar won't hide?
- Diskpart Commands Overview
- How to Use Bootsect
- Mouse scroll wheel jumps
- Issue: disk offline signature collision
- What should you do when Boot Manager failed to find OS loader
- What to do if ntoskml.exe is missing? Solutions here
- How to deal with error code 0x80070020: workable solutions only
- About Windows Update loop
- How to use OneDrive
- Computer randomly restarts
- Windows 7/8/10 Safe Mode when F8 is not working
- Windows 10 freezing
- Windows 10 preparing automatic repair
- Request failed due to a fatal device hardware (0x800701E3) error? Fix it!
- How to delete an EFI System Partition
- Windows Resource Protection could not perform the requested operation
- Monitor keeps going black
- 6 best ways to fix error code: 80070103
- Fix a corrupted user profile on Windows 10
- No speakers or headphones are plugged in error message
- If you get Failed to Enumerate Objects in the Container error
- If you get NVIDIA control panel missing error
- Windows cannot open the required file D:\Sources\Install.wim. error
- If you get Path not found C:\boot
- VCRUNTIME140.dll is missing error on Windows 10
- Winload.efi error on Windows 10
- If you get HAL is missing, or corrupt error
- If winload.exe missing on Windows
- If a 0x0000007a error appears
- How to fix unmountable boot volume
- What are System Recovery Options in Windows
- How to Fix Error Code 0xc0000001
- How to fix if it looks like Windows didn't load correctly error
- What to do if USER32.dll not found
- What to do if Rstrui.exe not working?
- Bootmgr Image is Corrupted - What to do next?
- How to Disable Secure Boot
- Insert your Windows installation or recovery media error
- Windows error 0xc00000e: how to fix it
- Remove the dual-boot menu
- The NTLDR is missing error
- If A disk read error has occurred
- If 0xc0000098 error appears
- If Windows could not start because the following file is missing or corrupt
- Setup Was Unable to Create a New System Partition Issue
- Error Code 0xc000014c
- If you get 0xe0000100 error code
- If you get UNEXPECTED KERNEL MODE TRAP error
- A 0x0000009f error in Windows 10
- If a black screen appears after login in Windows 7
- Restoring your previous version of Windows error
- Convert RAW to NTFS in 2 Steps!
- If you get an inaccessible boot device error
- How to shutdown Windows without updating
- If Windows update freezes your computer
- The requested resource is in use error in Windows 10
- If System Restore is not working
- ReFS: can you use it for RAID
- When PC getting stuck in resetting
- The 0x800f0922 error in Windows 10
- What is a repairing disk errors message
- System Restore failed with an error message
- Windows could not perform the requested operation? Fix it!
- If Task Manager won't open on Windows
- FTDISK_INTERNAL_ERROR? Fix it!
- My computer will not turn on but has power
- If you tired from automatic updates on Windows 10
- Monitor won’t turn on? The best solutions are here!
- [Task Scheduler] System and Compressed Memory
- [SOLVED] How to Recover Files from a Hard Drive that Won't Boot
- If computer doesn't recognize SD card
- If your computer doesn't recognize USB devices
- What is a "blank SD card" error?
- Recover files from LOST.DIR
- How to take write protection off the SD card
- Solved! Seagate external hard disk light blinking but not detecting
- How to Fix a Corrupted External Hard Drive at Home
- Windows 10: Computer won't read your SD card? Solve it now!
- If you Need to Format SD card to FAT32 in Windows 10
- A required device isn't connected or can't be accessed error
- If your computer won't boot from USB
- Windows Cannot Run Disk Checking on this Volume Because it is Write-Protected
- How to Reboot and Select Proper Boot Device
- External hard drive: “Access is denied” error on Windows 10? Here’s how to fix it!
- External hard drive having ‘the parameter is incorrect’ error? Fix it!
- You can fix the ‘Please insert a disk into USB drive’ error today!
- "Disk Boot Failure" error
- UEFI boot error on Windows
- Not enough unallocated space on target disk
- Host Process for Windows Services
- Fix Ce-34878-0 error on PS4
- Xbox One stuck on a green screen
- PS4 corrupted data
- Converting a dynamic disk to a basic disk
- Xbox One: recover saved games and other files!
- Seagate external HDD not showing up in Windows 10? Solved!
- Recover a Flash Drive that has turned RAW Effortless!
- Guide: How to Fix a Corrupted Hard Drive Fast
- How to recover data from a damaged external hard disk
- How to Fix a Crashed Hard Drive on Your Own
- How to Repair Partition Table or MBR on Windows 7/8/10 ?
- CHKDSK Commands and How to Use Them
- How to check hard drive health?
- Why Does CHKDSK Stuck and How to Fix It
- How to deal with smart hard disk error 301 on HP laptops?
- Boot from a CD
- Solved! Fix a dead external hard drive and restore files
- SVCHOST.EXE process: how to make it work properly
- Perform Western Digital hard drive repair today!
- Windows 10 Recovery USB Drive for Another PC
- If a USB port is not working
- If the last USB device you connected to this computer malfunctioned
- USB Flash Drive Unreadable? Solutions exist!
- External hard drive repair software
- How to safely use CHKDSK for disk repair in Windows 10
- Is it worth it to compress this drive to save disk space?
- Step-by-step guide on how to wipe a hard drive
- How to update your PS4 SSD? The Best Practices
- Everything you should know about moving hard drive to new computer
- If the Hard Drive Disappeared on Windows 10
- Seagate hard drive beeping: your actions
- USB Drive Unallocated? Fix it!
- Internal/external hard drive shows 0 bytes
- Disk is Write-Protected? Don't Give Up Yet!
- Creating new simple volume: only workable tips
- If you get This Device Cannot Start (Code 10) Error
- If the Unknown Hard Error message appears
- Initialize a disk before the disk manager can access it
- If you get hard disk short DST failure
- If the USB thinks it's a CD drive
- How to use a hard drive reader? How to access almost lost data without it?
- How to clear CMOS and why should you do this?
- If you get the “CHKDSK not working” issue
- If you get the “hard drive not detected in BIOS” issue
- If the MBR is corrupted
- If cloned drive won't boot
- How do I interact with the crdownload file? Is this important for your OS?
- Ntuser.dat - how should you interact with this file?
- Trustedinstaller.exe - how should you interact with this file?
- Primary vs. Logical partition comparison
- This is how to combine partitions Windows 10
- Solution for RAW Partition Recovery
- Bad sectors? Repair them without leaving home!
- External hard drive not showing up? Fix it!
- SSD failure: its signs and brief solutions
- Recover data from a dead hard drive? You can do it!
- [Solved] Wiped vs accidentally erased hard drive
- RAW SD Card Recovery in 3 Steps
- How to Repair a Damaged Partition with Partition Recovery™
- 2-step Guide on How to Partition SSD Without Harming Your Data
- How to play PS4 remotely on your PC?
- Fix slow Steam download speed now!
- Fix Tiworker.exe high CPU now!
- Steam game is not launching? Fix it now!
- Sedlauncher.exe: What is it and How to Fix High CPU Issue?
- What to do if a content file is locked in Steam?
- [Windows] Recover an unallocated partition today
- Fix This Device is Currently in Use issue
- [Solved] How to get files off a broken laptop safe
- MBR Recovery
- Revive Your Laptop Hard Drive With Recovery Tips
- How to fix hard drives at home
- Service Host Superfetch lead to High CPU Usage?
- If Hard Drive Short DST Check Failed
- What is MOM.exe and How Do I Interact with it?
- If a cloned SSD won't boot
- Here is how to deal with igfxem module high disk usage
- What to do if Xbox Game Bar is not working?
- Here is How to Deal with Xbox One X Black Screen Error
- Xbox 0x97e107df Error Occurring? Fix it now!
- OEM Partition and how to delete it safely
- Hard Disk Recovery | DiskInternals Partition Recovery
- Hard disk detected as RAW? Perform RAW Drive Recovery!
- An error occurred while updating Steam? Fix it now!
- Here is Everything You Need to Know About Maxtor Hard Drive Recovery
- What to Do if Double NAT is Detected on Xbox One?
- What to use: MBR or GPT
- Convert MBR to GPT without data loss
- Recover Files from Corrupted External Hard Drive Today!
- Make Unallocated Space Into Free Space
- Recover Data from Formatted Hard Drive
- Recover a Formatted USB Drive - Full Algorithm of Your Deeds
- The request not performed due to the device error
- Recovering Data from Crashed Hard Drive: Safe
- Steam is Not Opening Because of Clientregistry.blob
