Easy and workable tips on how to edit your MP4

Here you will find out:
- about hidden Windows video editor
- how to work with it
- how to make sure that your MP4 is safe
Are you ready? Let's read!
About hidden Windows video editor
If you want to edit a video file, you need to open it in the Photos application. To do this, select the video file with the right mouse button and select "Open With" and click on the "Photos" application.
Next, on the toolbar, click "Edit & Create" and you will see a variety of video editing tools available - just left-click the tool to use it.
To cut out a portion of the video, click "Trim" and drag the two markers on the playback panel to select a portion of the video you want to save. Then click the play button to play the selected video segment. If everything suits you, click "Save a copy", and you will have a saved copy of the trimmed video fragment. If pruning doesn't suit you, just click on the "Cancel" button.
The Edited video will be in the same folder as the original with the same file name. For example, the original video called Wild.mp4, and an edited copy of the video called Wild Trim.mp4.
Other tools work in the same way:
- The Add Slow Motion tool lets you slow down a portion of your video file.
- The Save Photo tool allows you to save a frame from a video as a photo.
- The Draw tool allows you to draw on video using a pen, pencil, or calligraphy pen in different ways. Your drawings will smoothly appear on the screen during the video and then fade out and disappear after a few seconds.
How to work with it
For combining videos with more complex and mesmerizing effects, you can use the Create Video With Text tool or the Add 3D Effects tool. You can also click the Add to Create button while the video is open and then click New Video With Music.
There's also a feature, "Auto Video with Music" — it also lets you choose your photos or videos, and the Photos app automatically combines them into a custom video.
When you select a video or photo to create your video, you will be taken to a screen with a project library, video preview, and storyboard panel.
Next, you need to click on "Add Photos and Videos" in the "Project Library" section and then drag and drop them onto the storyboard.
Next, you will see the editing tools in the storyboard panel. Here, in addition to the usual Crop tool, you can use the Resize tool, insert text using text, add visual filters using filters, apply motion effects using motion, and insert 3D effects using 3D effects.
The purpose and use of the tools are elementary:
- The Resize tool removes the black bars from the video.
- The Filter tool offers a variety of filters - from sepia to pixels.
- The Text tool offers different styles and layouts of animated text to place it in different places in the video.
- The Motion tool lets you choose different styles of camera movement.
- The 3D Effects tool provides a library of 3D effects, from raindrops to explosions and more.
- Aspect Ratio tool to switch between landscape and portrait orientation of your video.
You can also click the speaker icon to select the volume level for each individual video. This is useful if one of the videos is louder than the other.
In addition, the Themes option at the top of the window allows you to select different filters, music, and text styles that work together.
You can also click the Add to Cloud button and resume video editing in the Photos app on a different computer that you're signed in to with the same Microsoft account.
This video editor that you can get on Windows is not the most powerful - it's no secret. But, it is surprisingly efficient and can perform many basic functions with a simple and straightforward interface, which is suitable even for video editing lovers.
Make sure your MP4 is safe
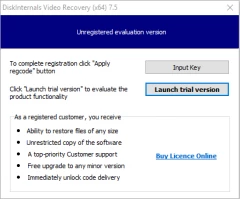
If you lost or damaged your video while editing your video, you'll be ready to recover it. To do this, download DiskInternals Video Recovery, professional software that has been used for many years to quickly and accurately extract your data. DiskInternals Video Recovery supports the following file systems: UFS, FAT12, ReFS, Reiser4, HFS, NTFS, XFS, Ext2 / 3/4, ReiserFS, and all Windows versions. You can also use the free trial version of the app and make sure the recommended software is effortless to use and recover deleted or lost videos quickly and correctly.
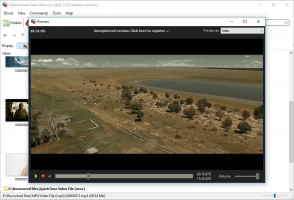
The amount of data recoverable is unlimited, so your possibilities are endless. Preview of recoverable files is also provided free of charge, so use step-by-step instructions to help you get the video you need without any problems:
- Step 1. Install and run DiskInternals Video Recovery.
- Step 2. The Recovery Wizard will start automatically and ask you to select the type of files that you want to recover and the location where the data was lost.
- Step 3. Scan. It can take some time.
- Step 4. Preview. Preview the deleted files by right-clicking them and choosing Preview in New Window.
- Step 5. Recovery. This process is fully automated and does not require your participation.
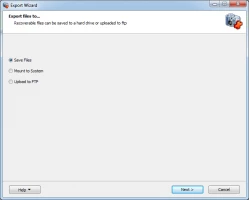
- Step 6. Save video files.


You only need to buy a license for this application and enter the received code into the corresponding window to export video files. To avoid data overwriting, save the recovered video to another safe location. It is also recommended to make a backup copy of important video files in order not to get into such situations.