How to rebuild RAID 5 without losing your data
In this article you will find out:
- when you need to rebuild RAID 5 array
- how to perform rebuilding of a RAID 5 array and not to lose any data
- what the software is the best for RAID 5 data recovery
Are you ready? Let's read!
When you need to rebuild a RAID 5 array and why you need to back up
Rebuilding a RAID 5 array is necessary in cases where one disk of the RAID 5 array stops working, even if it does so temporarily. Of course, that is only one drive; you can work well and not notice any kind of data loss.
But!
If RAID 5 works in that worsened condition, when other disks "replace" and perform tasks instead of the defective drive, that means they will deteriorate faster. And it is only a matter of time before the second drive will fail. Also, it should be mentioned, that for RAID array using similar disks, if one disk has failed already, then other disks will follow it soon.
If RAID 5 is not regularly monitored and tested, and the defective drive not replaced, there is a very high probability of another disk crash.
In this case, RAID 5 data recovery will be pretty hard and almost impossible. All you have to do to avoid RAID 5 death is replace the failed disk itself.
If you have a backup of your data, that's great. Even if two RAID disks go down, you have nothing to worry about.
If you do not have any backup, be sure to use RAID Recovery software to recover data from a damaged RAID disk. Because after rebuilding a RAID 5 array, the data will be overwritten; i.e., it will disappear forever.
Tips to rebuild a RAID 5 array without data loss
So, how do you not lose any data in the rebuilding process?
Here is what is recommended to do before you rebuild a RAID 5 array:
- The main tip is: do not create a new RAID array on old drives! That will destroy the newly-created RAID and all your previous data.
- Image is important! Before you rebuild a RAID 5 array, create a RAID structure image, as well as a backup on a separate volume. These actions will secure your data immediately before restructuring.
- Save the backup twice. To be extremely confident in data integrity, test your backup with multiple restorations. And it is best to do it in different physical places.
What is not recommended to do before you rebuild a RAID 5 without losing data:
- Until the data is restored, you should be careful in all your actions: do not create, copy, move, add, delete or save any files on the disk; do not open bulky programs and applications. All this will lead to overwriting data on a damaged disk.
- Never use CHKDSK or FSCK before creating a backup. Otherwise, the file system will be fixed and delete or re-corrupt all data on the disk.
RAID 5 is rebuilt, but data is lost?
If you have used the tips described above, you should not have any lost data. But what if your data is gone already; is it too late?
Not always. You can recover data as much as possible using RAID Recovery software. It has a free trial version with all the features of a licensed one. And only after you make sure that your data is recoverable, do you need to pay a license for saving it.
How do you perform RAID 5 data recovery?
Follow these instructions:
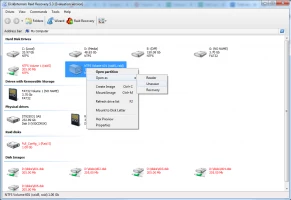
- 1. Download and install Diskinternals RAID Recovery. The damaged disk array connects to the computer as independent local drives.
- 2. Open the RAID Wizard and select RAID members.
- 3. Use Reader or Uneraser mode to open the logical disk (it is contained in the hard drive section of the RAID disk).
- 4. After scanning, which may take a while, you will be able to preview recovered files.
- 5. To save recovered data, follow the wizard. Save your recovered files somewhere else, not the original place.
In case you are recovering lost files using a RAID disk image:
- 1. Connect the defective disk array as independent local drives to your computer.
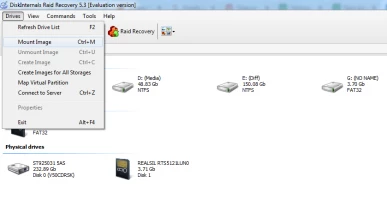
- 2. Run Diskinternals RAID Recovery™. Perform these actions: Click "Disks" -> "Mount image".
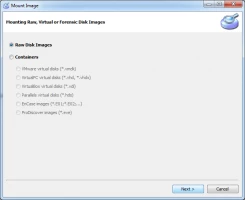
- 2.1 Select "Disk image of RAW" -> "Next" -> "Select and attach a disk image".
- 3. After the disk is connected, click “Commands” -> “ RAID wizard”.
- 3.1 Select “Standard mode” and “RAID”.
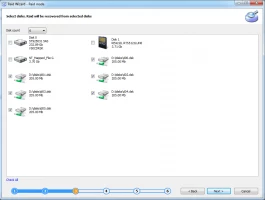
- 4. Choose the disks and location for the RAID recovery. Click on Next.
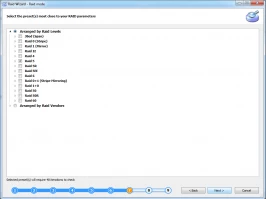
- 5. Click on “Arrange by RAID Levels”. Select the type of RAID array (in this case, RAID 5).
- 6. Right-click on the restored RAID 5. Select “Open as” -> “Reader” or “Uneraser”.
- 7. Data scanning will begin. Recovery of the found data will occur automatically (you will have to enter a license key that you get after purchasing a license ). Select the files you are interested in and save them in a new safe place.
Good luck!
