Solved! Recover unsaved Word documents on Windows 10!
Have you been working for all night and occasionally does not saved your word document? This article is for you!
Here you will find out:
- the best Windows in build methods to restore unsaved word document
- how Word Recovery can help you
- how to use AutoRecover properly
Are you ready? Let's read!
1. How to recover unsaved Word documents with Windows tools
Recovery of a Word document that was not saved can be done using built-in Windows tools. To do this, do the following:
Go to File / Manage Document and click on the File tab.
Now select “Document Management”, then “Recover Unsaved Documents”. In the new window, you will see a list of all unsaved Word documents. Select the documents you are interested in and click Open.
Your document is now available; save it in order to avoid a similar situation in the future. To do this, click on the "Save As" tab and select a place to save.
If, for some reason, this method did not help, and you still do not know how to recover an unsaved Word document, go to the next paragraph.
2. How to recover unsaved Word documents with Word tools
This method is effective when a computer is suddenly rebooted, if there is a power loss, and so on. All you need is to re-open the Word document and on the left side you will see the Document Recovery tab. Unsaved documents can be restored by double-clicking the left mouse button.
3. How to recover unsaved Word documents with AutoRecover
This method is also quite effective; you just need to know all the features of such a recovery.
Hover over the taskbar and right-click on it. From the list, select "Task Manager". Go to the tab "Processes" and select any instance of Microsoft Word. Now click "End Process". This should be done as many times as necessary to close all Word documents.
After this, reopen Word.
If unsaved files were found automatically, they will be visible on the left side of Word. In this case, you can open and save the document as described in paragraph 2. If Document Recovery does not open, you can search for documents manually. Click the File tab and select Recent from the list. Now click “Recover Unsaved Documents”.
If you still cannot open the documents in this way, use the following reliable and proven method, and you will learn how to retrieve unsaved Word documents without any problems.
4. Use Word Recovery to bring back your Word documents
Unfortunately, all of the above methods are imperfect; quite often, it happens that a document with important information is lost forever, which can cause many problems for you.
The good news is that special software, DiskInternals Word Recovery, is specially designed to restore Word documents. This software supports the following operating systems: Windows 10, 8, 7, Vista and previous versions as well.
You can use DiskInternals Word Recovery if the document was accidentally deleted, formatted, or not saved before exiting the program, or if some system errors occurred that erased this file.
The software recovers all popular types of Word documents: .doc, .docx, .asd, etc. There is also a free trial version of DiskInternals Word Recovery, which lets you preview the documents found. You will have the opportunity to try the software at work before purchasing a license.
You can download DiskInternals Word Recovery right now and, with the help of the instructions described below, quickly recover data.
5. Guide: Retrieve unsaved or lost Word documents with Word Recovery
This guide describes in detail how to recover unsaved Word documents in Windows 10 using Word Recovery.
Step 1. Download and install DiskInternals Word Recovery.
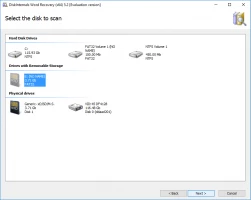
Step 2. The recovery wizard starts automatically and prompts you to select the location of the lost Word file. This may be a hard drive, external hard drive, USB flash drive, memory card, SD card, etc.
Step 3. Scan the disk. Select scan mode: fast or full (recommended). Then wait for the process to be completed.
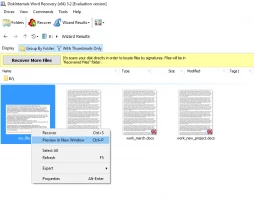
Step 4. Preview and restore. After scanning, you should see files that can be recovered. Right-click on the document and select "Preview in New Window." Recovery will occur automatically.
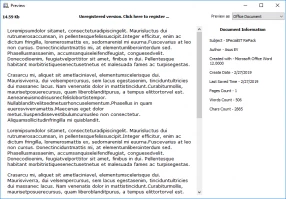
Step 5. Saving documents. To do this, you just need to purchase a license for this product and enter the license key. Do not save the recovered data on the same device to avoid overwriting the data.
Bonus! Use AutoRecover to avoid unsaved Word documents
Another common situation: you are working with a previously saved Word document, but for some reason, the document closed without saving changes.
Sound familiar? Microsoft Word by default only saves the last 10 minutes of work, but you can change this setting and thus not be afraid of such situations anymore. So let's get started.
Click on the File tab, then select “Options”, then click on “Save.” In this section, you need to select the frequency with which recoverable versions of the document are saved. Then click OK. Thus, you yourself can adjust the automatic recovery function at your discretion.
Good luck!
